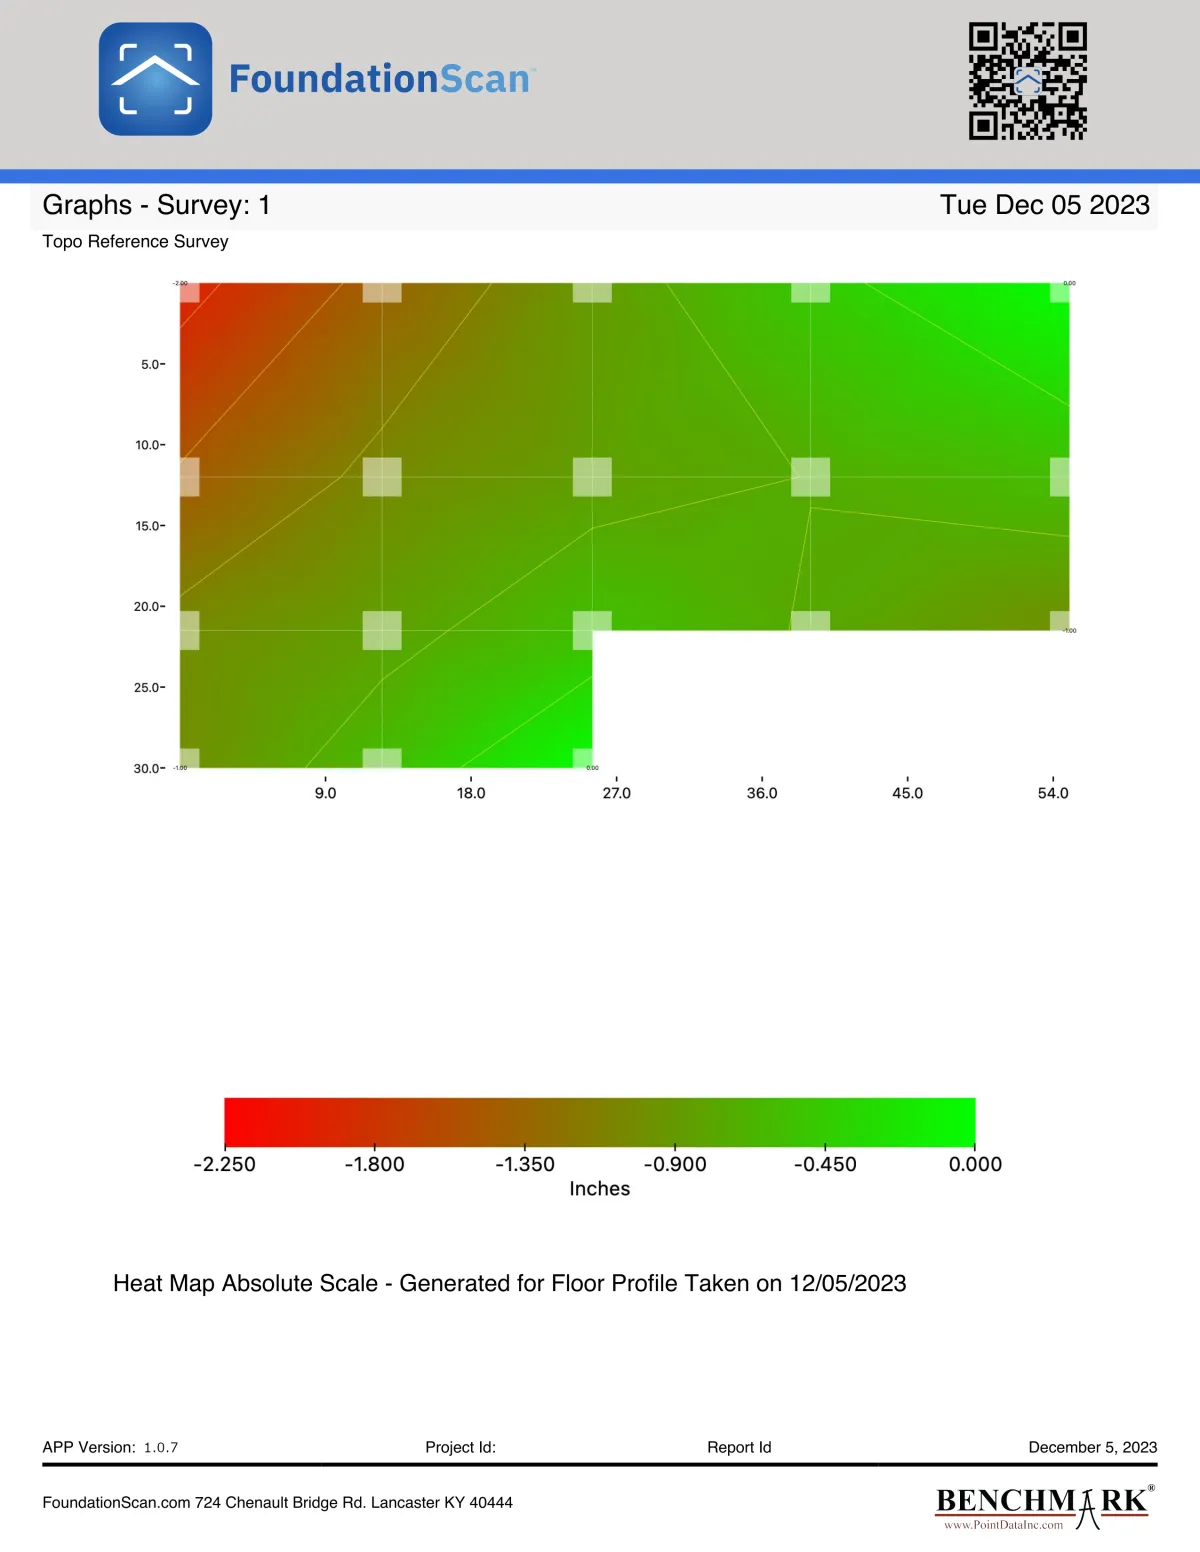
The Benchmark® Topographic report, “the Topo”, records the height from a flat surface to the floor, and represents that data with a heatmap. Usually, red is used to indicate lower areas of the floor and green higher areas.
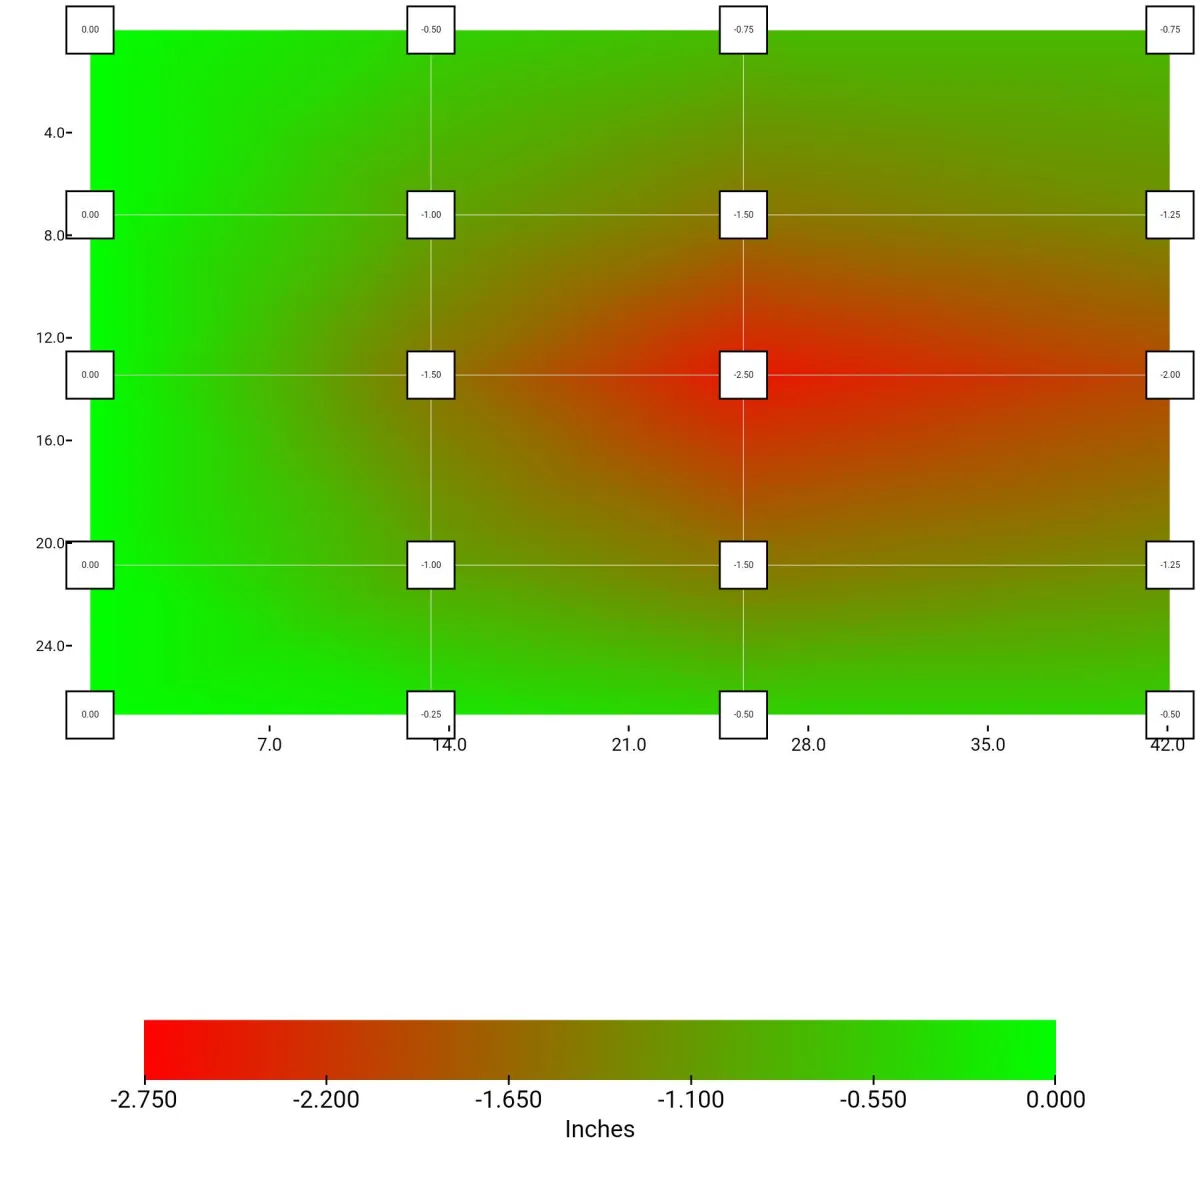
The Topographic report, “the Topo”, records the height from a flat surface to the floor, and represents that data with a heatmap. Usually, red is used to indicate lower areas of the floor and green higher areas.
The heatmap shows the shape of the floor and pinpoints areas where additional support is required.
Key Benefits:
(1) Shows the entire floor allowing the floor to be
addressed as a single unit.
(2) Monitors changes in the floor over time.
(3) Allows the comparison of multiple story buildings to
analyze more complex issues.
(4) Prevents over lifting a section of the floor.
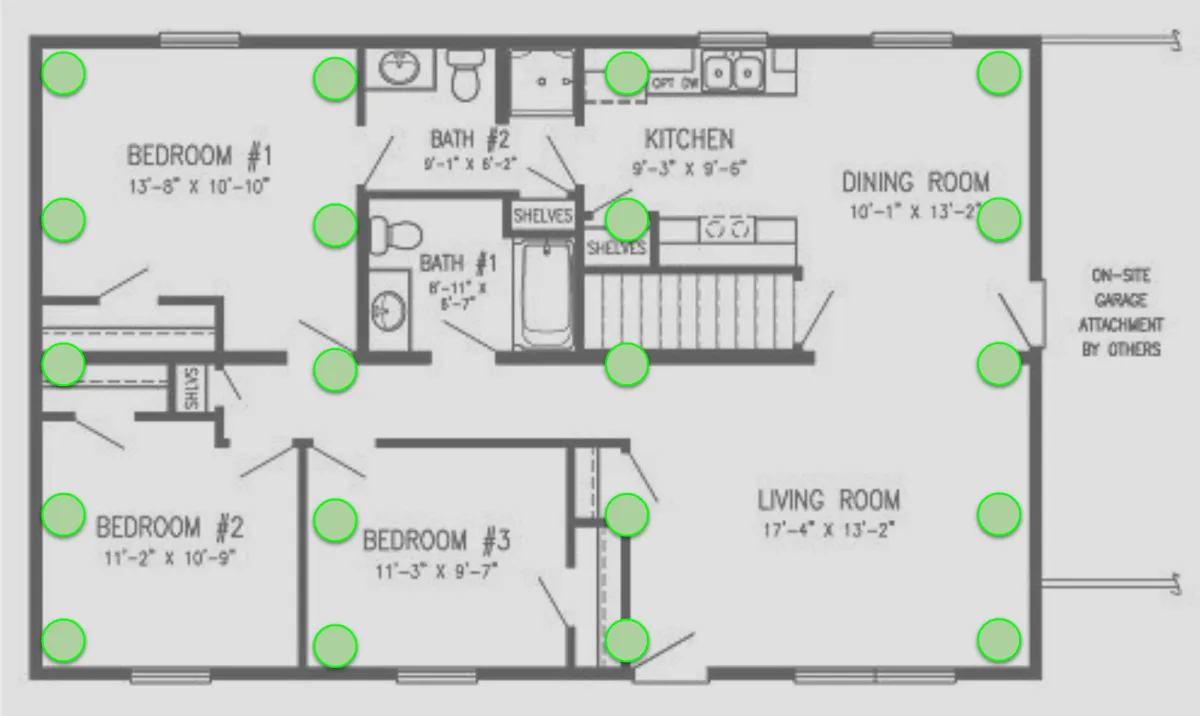
The first step is to decide the points where to measure the heights.
Each green circle on floor plan indicates a point where an elevation measurement will be taken. In this case the points are along walls, and they form a rectangular grid. They are not evenly spaced.
The center wall is supported by supports in the basement. Insufficient support can lead to a sagging floor. Sometimes moving or adding a heavy bookcase, or some other piece of furniture can put too much load on the supports that then need augmentation.
The garage added after the initial construction also can change the load on the original foundation.
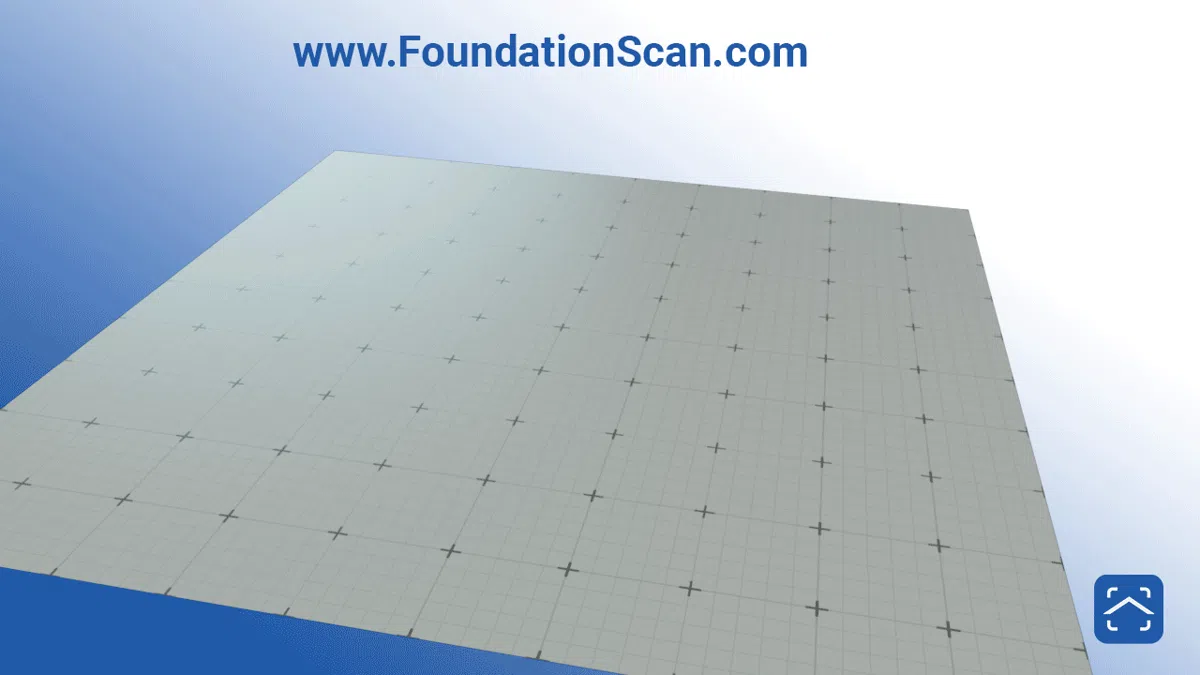
The Topographic report, “the Topo”, records the height from a flat surface to the floor, and represents that data with a heatmap. Usually, red is used to indicate lower areas of the floor and green higher.
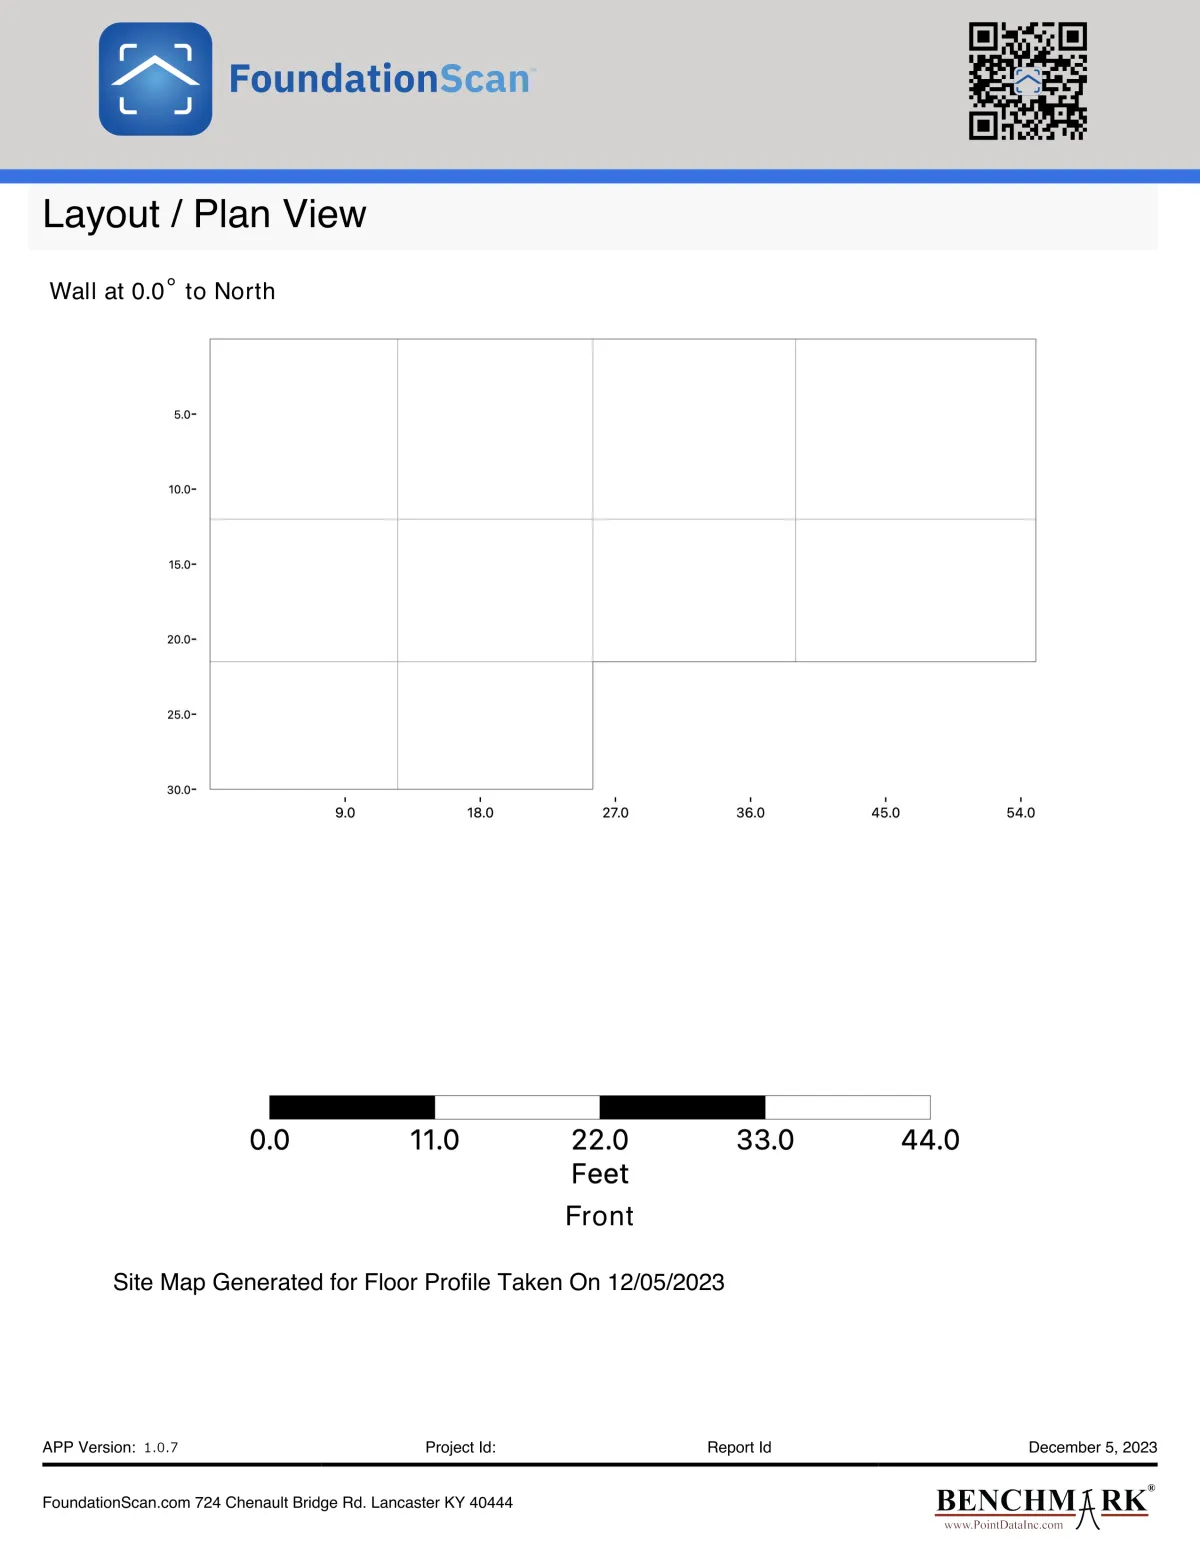
In the figure to the left, the data point grid is the square array of marks. In actual surveys the grid may be square, or it may follow walls and support beams below the floor.
A laser generator is mounted on the tripod and the technician uses a tape measure to measure the distance between the plane of laser light and the floor.
The technician may choose to use a tool that has a liquid filled tube to measure the height of the floor.
Both systems work well. They measure each point relative to a single height, so the heatmap represents the shape of the floor.
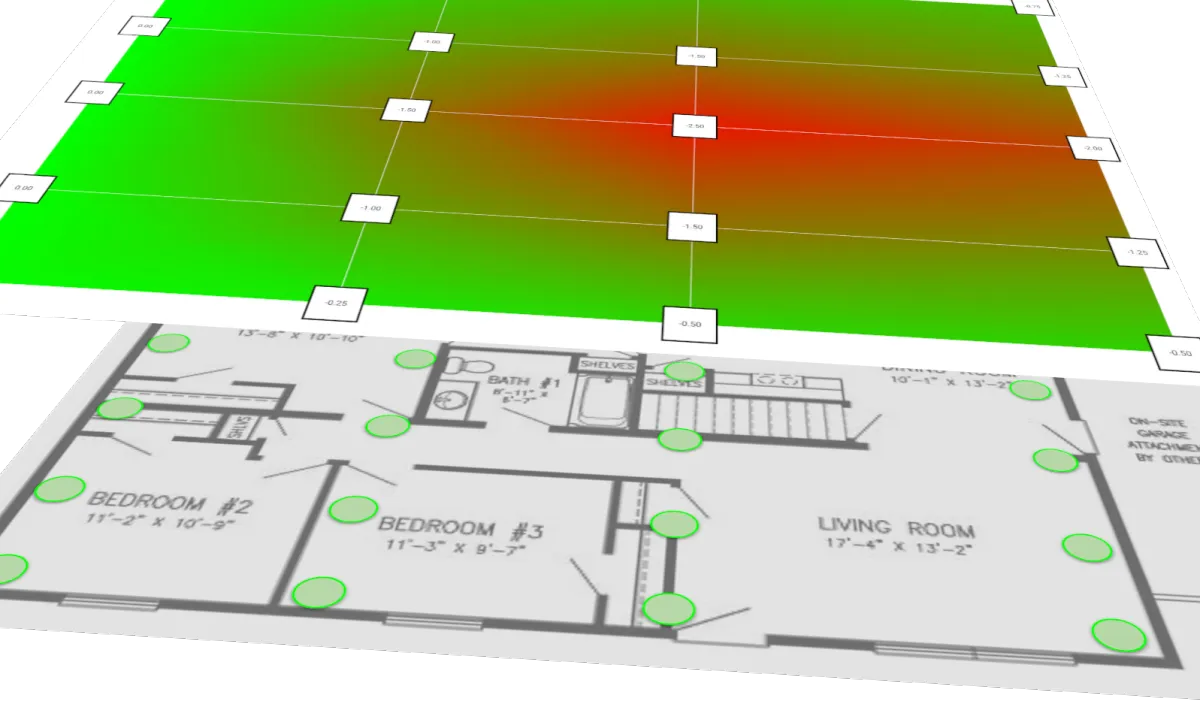
The technician enters each data point into the FoundationScan® App, and the App immediately produces a heatmap showing the deviation of the floor. The heatmap to the left show that the floor is sagging along the center beam and that the deviation of the floor increases as it gets closer to the garage.
The elevation at each data point is shown at the grid points. The elevations are in inches. The length and width positions are shown in feet.
Second Picture Caption
The heatmap with the original sitemap showing how the heatmap aligns with the floorplan.

Don’t just take it from us!
CUSTOMER REVIEWS
Six years ago, I was walking around my garden and noticed some stair-step cracks in my brick. I contacted a Benchmark® contractor for a follow up and was elated to learn that the structure had no significant movement since the initial Benchmark® report. The engineer came back and was able to identify a minor easily correctable problem. I had several contractors suggesting to me that necessary repairs could run into the thousands. Knowledge is power and I am grateful I invested in the Benchmark® reports used by FoundationScan®.

Jan / Homeowner
I use Foundation Scan to help my team identify areas that might have been overlooked during diagnosis. With its data-driven insights, we can base our repairs on facts, giving us a powerful tool to present options to customers. For areas that don’t need immediate repair but should be monitored, FoundationScan® builds trust by providing clarity and transparency. It has truly changed our business for the better.

Chris / Foundation Repair Contractor


